Showing posts with label DIY. Show all posts

Saturday, January 4, 2014

Snowflake make up - small tutorial + outfit

The day before Christmas Eve (in Sweden it's December 23) I was in need to buy some additional gifts. Well, need and need...I wanted to!

So I got into that Christmasy spirit that even us Goth people now can get after watching Nightmare Before Christmas slavishly for years.
I felt like a small vampire chick that just tasted her first blood drop as I went wild with my Kryolan Fluid Foundation TV-white and painted snowflake after snowflake on my pretty face. 
As I added the glitter I'm sure I felt the cold, black Goth heart of mine to acctually make a beat! It was THAT good!
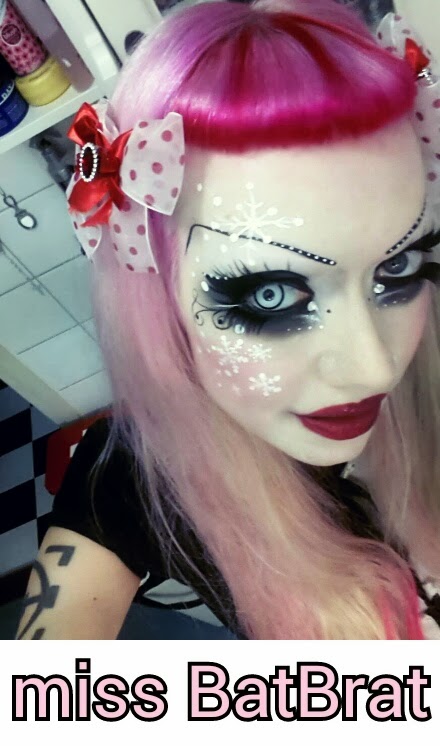
Don't ever be fooled by my cute smile, I'd make your body cold in a heartbeat.

The making of the snowflakes

Kryolan Liquid Foundation TV-white is what I use as a "liner" together with an aquarelle brush, preferably made out of squirrel hair. I naturally only buy brushes made from roadkill squirrels ;)

I slap on the glitter by first dab my ordinary chapstick softly in the area where I want the glitter, then dip a round brush, and shake some off before dabbing it to the area.

The snowflakes was made by first making 3 lines like an "x" kind of, then painted one or two small "v" shapes on every line. I topped it off by using the wooden end on my aquarelle brush to make perfect dots. Secret out!

The coloring of the bangs

I colored my bangs like a candy cane by first using a small amound of Direction's Pink Flamingo, a small dash of Direction's Purple and all mixed with lots of conditioner to get my soft pink. It could have been lighter this time though.
For the streaks I used Direction's Poppy Red.
And the boarder of the bangs is Poppy Red, Pink Flamingo and Pink Flamingo with conditioner. I wanna lick it!
The pretty bows I made at my tea girls crafting evening. They are made from 3 different kinds of ribbons made into bows and hotglued on top of another. But before I glued on the last red bow I pressed an earring (that I bought cheap on sale) right trough, bended it on the backside and then glued it on top of the others. Hotglued a metal hairclip and some felt on backside.
Could I look any more like "What are you talking about? I don't understand.."
So posing :D  To bad it's blurry.
From the side as well. Sorry about the foundation slip around my little nose, but this is just before bedtime so it's a bit smudged after snorting glitter all day  :)
Great shot of my bow as well.
The contact lens is white with a slightly thicker black border (can't remember, but not Clearly Colors Special Effects: Manson)
The candy cane bangs. Well, not at it's best behaviour after being out in the wind all day.
Ehh...don't ask.
And then I was ready to go out and shop!

Too bad you can't see, but I'm wearing the most fab diamond sprinkled pantyhose from Kawaii Design
I'm wearing a pair of black tights under to make them darker.
Price 129 SEK.

Wednesday, June 27, 2012

Crafting: To make a big poster yourself


The framed picture I made yesterday was made like this:
  • big frame
  • a pretty wallpaper
  • printer paper (I used matte photo paper)
  • scissors
  • glue/scotch
  • a lovely picture (pretty you perhaps?) in high resolution
 Photoshop your picture in a style you like (I wanted mine to look a bit like a cartoon and very smooth = surface blur, contrast and down on saturation).
Go to Blockposters.com and upload your picture. No registration, just upload an image from your computer and choose how many sheets wide you would like your poster to be once printed.
You can make it HUGE!
Once you're happy with your selection, you can download the PDF file (or print it) containing your newly created images and print each one massively blown up, resulting in a huge pixel poster to stick on your wall.
  I made mine 2 A4 portrait wide.
I can make it as big as I want:
I printed my image on matte photo paper, cut out the images of us and glued it together to one big piece.
Put a piece of wallpaper in the frame, then the cut out picture of us and that's it really.

Make a big collage if you want - add text on stripes, glitter, hearts - go wild!


Friday, March 30, 2012

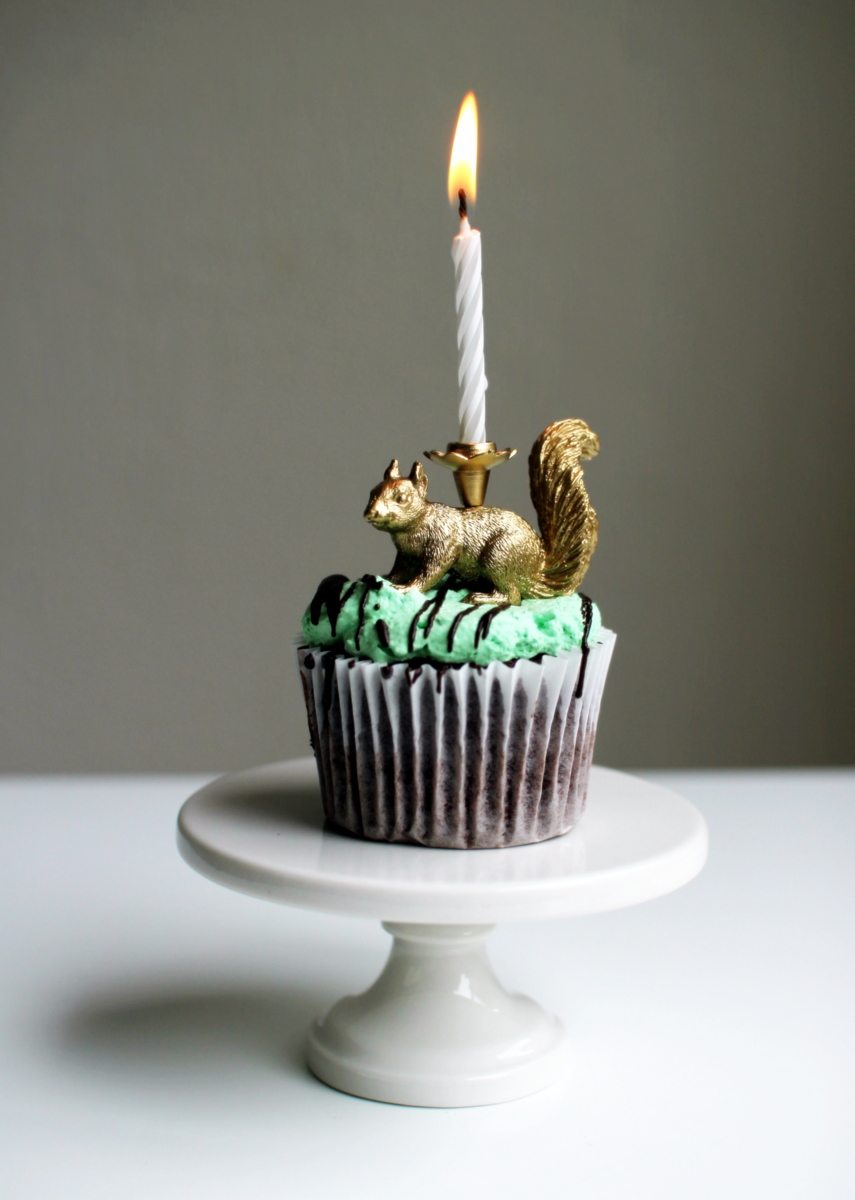
Crafting: DIY Glitter plastic animal

I bought a plastic animal, an elephant, at the charity shop last week.
Being a bit inspired by the DIY plastic animal candle holder at The Sweetest Occation I wanted to make a pink elephant, with glitter.
How to:
  • plastic animal
  • glue
  • brush
  • acrylic paint (- pink and white)
  • glitter (pink)
Clean the animal (I put mine in the dishwasher).
Paint with acrylic paint in the same color as the glitter you will use.
(I painted one coat of white priming before the color, but that's not necessary)
Let dry.
Paint one coat of glue (don't be cheap!) and dip it in glitter/pour it over. Shake off the excess glitter.
DONE! (I also used a very thin layer of hairspray and then shine spray on top).

Published with Blogger-droid v2.0.1
I will not use my pink elephant as a candle holder, but I plan to make a small hole in the snout so I can make small speech bubbles as table chatter...or put it on cookie plates with info about the cookie.
It will look so cool! Glitter rules!
To make the plastic animal (elephant) goth you could dip it in black glitter instead and add some "blood" at the end of its tusks and make him say things like "-I'm Norman Bates."

Saturday, March 10, 2012

Reader Recommendation: Bleiu - DIY Goth Bat Bow

Sweet reader Bleiu  send me this crazy cute GOTH BAT BOW to glue to a headband DIY.
I't's so BatBrat! Thank's for thinking about us and sharing! Here it is:

What a smart idea from Goth crafter Audronasha!
Check out her DIY site here.
Step 1
1 Cut a triangle form leather and shape the sides just like in a picture, so they would look like a bat wings :)
Don't forget to cut a strip too. About 1 cm wide and 2,5 cm long.

Step 2
Gather the center with a sharp needle and strong thread.

Step 3
Glue it with a hot glue gun to your hair bow.

Step 4
Glue the leather strip on top to hide the thread in the center.
Thank you ever so much for helping your fellow bat lovers, both Bleiu and crafting artist Audronasha <3
I will most definately make my own (some day...). It is super cute and mine will be totally bratty.

Sunday, January 29, 2012

Pretty goth shoes: DIY

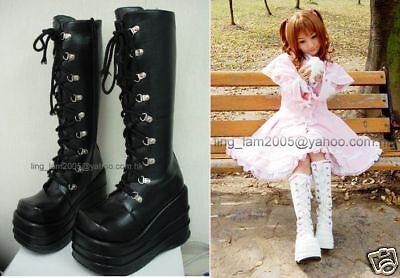
I have had a hard time getting the cool goth platform shoes I wanted.
Here's the story on how I got my new "homemade" shoes. Take some grown up by the hand as I let the story begin...
The shoes underneath have been my quest for a very long time.
I found them on a picture, but to find them "live" where I actually could buy them has been hell!
Here's my dream shoes:
I've gotten so many helpful tips from everybody that have read my call out for help but unfortunately I never found these exact ones.
The ones found was always too high and not shiny.
I wanted boots that were medium high - mainly because I often wear lace stockings and wanna show them off.
No use looking cool if noone can see it!
And I love glitz and glam so I need my boots to be shiny.

After failing like a snail trying to use powder for a matte look I just had to take my business elsewhere - and I found these:
Not what I was looking for - but they had potential!
When I goth them they were not as shiny as on the picture, but not as matte as leather look either.
They are so comfortable and are my absolute favorite boots ever (well, at the moment)!
I bought them with the intent of altering them.

This is what I did:
Snip snip
So much better
Ta-daa! Almost as they were supposed to be. I didn't want a satin bow, but that was all I had at home.
Now I have changed to what it was supposed to be to begin with: dirty white crochet lace bows. So cute!
Here is how they look on my lovely feet

I think there is some "Today's style" picture recently with the new bows.

Friday, January 27, 2012

BatBrat design

Here's one of the first plates I made.

I love it!

It holds 60 degrees Celsius in the washing machine without problem.

I have made a few others (different text) before, but now my confidence is up and I will actually make a few for my (so far empty) etsy.com.

Wednesday, January 25, 2012

Dollhouse: Pool part 3


Chocolate box turned into a pool area!
It's just some minor details left. I'm thinking about adding some white tiles around the pools as well.

I should so win an award for this one!

Tuesday, January 24, 2012

Dollhouse: Pool part 2

First step done. I'm very impressed by myself so far!

Now it's time for some Lego time with my son TeeBee who's always home on Tuesdays. Suits me perfect today since I'm down with a small fever and massive headache.

Sneeze, sneeze and sneeze all day long. Poor me have not even make up on!

THAT'S how bad it is..

Dollhouse: Pool

The dollhouse needs a pool the kids said.

An old chocolate box, a roll from a tape and some print outs of grass, pool water and a brick wall might do it?

Will be interesting to see how this will turn out..

Thursday, January 19, 2012

Old picture of the day

This was about 2001....that would make me 29 years at the time.
It's my first ever home made dreads! I was quite impressed by myself at the time I remember.
Just search youtube.com for double ended dreads. I'm sure you will get lots of Kanekalon professional tutorials.
There are a thousand ways to make them. I want mine to be skinny and light and I do rarely attach them but use clips for easy removal.
I kind off do them the same way nowadays as well, but now I make double ended ones.

Kanekalon hair.

Take out a small amount of hair.

Fasten it on a hanger/door handle by the middle.

Start back combing (I use a lice comb) as you twirl one side of the double ended dread. Mess up, pull it straight, twirl, back comb..and so on.

When you are done you do the same to the other side of the double ended dread.

When you have made as many as you need it's time to do what we goths do best - self harm.

Put on a kettle of water in a tea pot (for controllable steam) and slowly move your dread through the steam as you twirl it. You will see it twirls itself and tightens up. You have to move at the same speed and range from the steam to make them even. Close for tight ones, and further away for fluffier.
(You will notice the self harm bit here because you always manage to burn yourself.)

When they are all done I usually seal them by dipping the ends in the boiling water.

Now you can braid them in or just fasten them with clips and put them up in dread falls.

Well, there are most certain better ways, but for me this always works since I hate having stuff attached to my hair.
I am NOT a pro at making or attaching dreads.
But I like to wear them :)

Wednesday, January 18, 2012

Sleeping with goth's: Goth gadgets


When you position yourself in the coffin pose every night (or day for those who can't enter the light) you want to sleep in style.
With those new completely dark drapers we don't even need a coffin any more so we can enjoy having a stylish bed and lovely linen.

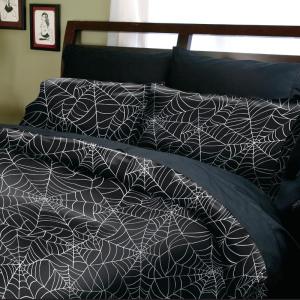
Spiderweb is something you never can go wrong with, but personally I would have prefered a white with black webs. I'm sure that's available somewhere.

These are from Sin in Linen and can be bought for $79 HERE.
I have an old classic bed from IKEA (this is from my previous apartment). I also made a matching gantry to make it a canopy bed (in the 90's there were no such beds to get hold of here in Sweden so I had to make my own..)
About half of my friend group have the same one... I really, really like it.
Two of the 3 kids was made in it, that's how good it is!

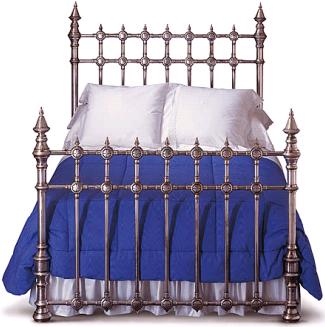
BUT if I have had not this bed I'd love to be in bed with one of these:
From Wrought Iron Furniture . But what's with the bedding?! Whooa, those "normal" people are just SO scary!
This is my favorite amongst the group!
An all white bedroom and some blood squirts (fake, if you wish) over the linen and the walls.Wow, it would be so incredible!

This bed is so pricy I would probably scream myself to sleep every evening, but it is pretty!
It's a Tennyson bed from And So To Bed. Can be bought for $4000 (?) and above if I'm not mistaken.

Not liking the rest of the room, just the bed. To me it looks a bit like Flander's bedroom with those curtains and stuff. Like seriously religious instead of cool goth. But the bed itself looks lovely.
At Corsican you can look at 2545 different kinds of beds, many beautiful goth worthy, but I have no idea where to buy them :(
But you can't write about gothic beds and not mention Newtons over the top beds!
What little goth girl have not dreamed of having adventures with another dark soul in this roubust bed.
Newtons Versailles Noir bed can be bought HERE for this months special price £799.
In my apartment this fantastic piece would unfortunately not look so good since the rooms are quite small, but a girl can dream, can't she?

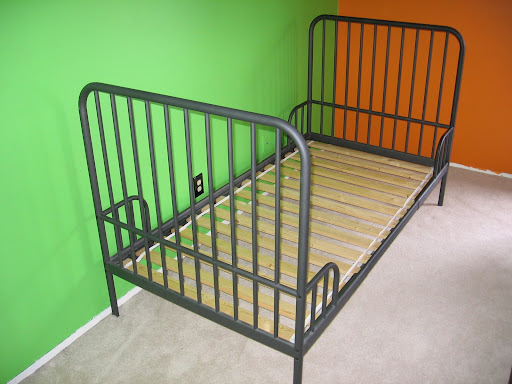
Our kids have this kinds of adjustable beds: all from IKEA.
It seems to still be available HERE for £74.99.
Bed "Minnen". Synthia's is the same, but in black.
This is the style of TeeBee's bed (but not his actual bed). I love the "prison" feeling to it. Perhaps he does not...
This one seems to be available HERE for $115.

All their rooms are getting a slight make over now when the Christmas things are out.
Fairlight wants a Candy room, Synthia a Jungle room, and TeeBee is not yet decided on if he wants a Robot room, an Aeroplane room or an Aqua room. I hope he goes for a Robot room!

The kids all have their own room, but if they were supposed to share a room I would so go for this one!
Prettiest bunk bed I've ever seen.
I love all you designers that makes life so much more beautiful <3 Thank's!

And all of you creative people out there:
You can just buy some MDF board, and paint the style of the bedhead, incredible cheaper but still cool! Or buy this very light, but thick, aluminum metal wire and shape it. It will not be as sustainable but it may achieve the right look.

Sleep tight, (don't) let the vampire goths bite!